How I Built My Ubuntu
Linux/XBMC Media Center
|
| Add one old computer salvaged from the
scrap heap, $39 worth of second hand components from ebay and
some free, open source software and we now have a nice internet
and LAN connected media server! Maybe you can do it too. |
| By Larry Laird | lairdslair |
|
|
 I
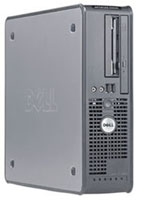
found an old Dell GX620 desktop that was in the process of being assigned to
the dumpster recently and decided to try to rescue the unit and put it to
some good use. It had no peripherals with it at all. No keyboard, mouse,
monitor, not even a power cord. I wasn't sure it even worked. I took it home
and plugged it in and lo and behold it sort of booted to Windows XP.
The OS was corrupted in some manner but it did boot OK. I wiped the 80
GB drive and installed Ubuntu 12.04 32 bit. The unit booted and ran
perfectly. I
found an old Dell GX620 desktop that was in the process of being assigned to
the dumpster recently and decided to try to rescue the unit and put it to
some good use. It had no peripherals with it at all. No keyboard, mouse,
monitor, not even a power cord. I wasn't sure it even worked. I took it home
and plugged it in and lo and behold it sort of booted to Windows XP.
The OS was corrupted in some manner but it did boot OK. I wiped the 80
GB drive and installed Ubuntu 12.04 32 bit. The unit booted and ran
perfectly.
The question was now what to do with it? We have plenty of computers
here at the house and I couldn't think of anyone off the top of my head that
I knew that needed a desktop. I was admiring the compact footprint of the
little Dell when it hit me that it might make a great little head unit for a
media server to hook up to our 42" Panasonic HD 1080p Plasma TV sitting in
the family room.
We run our own server at the house and it already has over
a month's worth of digital music and a good selection of movies on it.
It seemed like a good idea to watch movies and online video on the flat
screen from the server and listen to ripped music and internet radio on the
attached surround sound system. The specifications of the Dell when I got
it;
-
Intel Pentium D 820 2.8GHz CPU
-
1GB DDR2 Ram
-
80GB HDD
-
CD/DVD Combo drive (No Blu-Ray)
-
Integrated Intel Video Card with VGA out
-
Integrated Sound Card
-
Integrated Ethernet
|
| |
| HARDWARE MODIFICATIONS/ADDITIONS |
| |
The hard drive seemed to be fine and since I
would be accessing files from the media server that contained 2
TB worth of hard drive space the 80 GB local drive really didn't
need to do anything but contain the operating system so it was
OK as it was.
I thought I might need a bit more ram and
found two 1 GB sticks of used ram for the box on ebay for $7
shipped. That gave me 3 GB total.
The integrated Intel graphics
card was also a bit weak and only had vga out which would not
work without an expensive and what appeared to be unreliable
conversion. My TV has no provision for VGA in. The
little Dell takes low profile 1/2 height cards and I managed to
find a pulled ATI Radeon X300 64 MB PCI-E
PCIe with DVI and S-Video out again on ebay for $5.95 with free
shipping.
My house is not
hard wired for Ethernet so I was going to have to go
wireless to the media center computer. I happened
to have a little
TP-LINK TL-WN722N Wireless N150 High Gain USB Adapter,
150Mbps, w/4 dBi High Gain Detachable Antenna, IEEE
802.11b/g/n, WEP, WPA/WPA2 dongle that I bought
some time ago that wasn't being used. I think
New Egg has them for $17 - a hell of a deal.
My wife uses the same adapter on her computer and it has
been great. This little $17 wireless device is
worth every penny, highly recommended. It just plugs
into a USB port and has an extension cord to the dongle
and a single antenna. Ubuntu recognized it instantly and
already had drivers for it. Couldn't have been
simpler. |
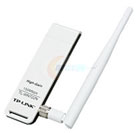 |
| TP Link TL-WN722N |
|
|
| |
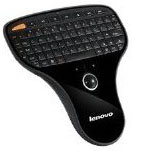 My
final piece of hardware required was some sort of mini wireless
keyboard with an integrated mouse of some sort. Again
going back to ebay I found and purchased a used Lenovo N5901 for
$26 including shipping. It has an integrated mouse trackball and
2.4GHz dongle. My
final piece of hardware required was some sort of mini wireless
keyboard with an integrated mouse of some sort. Again
going back to ebay I found and purchased a used Lenovo N5901 for
$26 including shipping. It has an integrated mouse trackball and
2.4GHz dongle.
The claim is a 10 meter range which I can't confirm but it
certainly works just fine from my seating position in the family
room. Once again, Ubuntu 12.04 and XBMC recognized the hardware
immediately. The only other expense with the keyboard was fresh
batteries. The keys are pretty small and there are no F keys but
it does seem to work well.
|
|
|
| |
| ADDITIONAL SOFTWARE |
| |
 I
had some experience with
Mythbox that wasn't particularly positive so I decided to
look for some other type of media server front end. I
could play movies right out of Ubuntu with VLC or Movie Player
and I could also play network music and internet streaming music
as well but I wanted something that integrated the whole thing.
I found it with software called
XBMC. It comes in version for Windows, Linux and Apple
OSX, ATV, ATV2, iOS, Android, and Raspberry Pi. I began
with the current stable release called Eden. I migrated to the
most current release called Frodo (ver. 12) Release Candidate 3.
I'm unsure if it was Eden or something else but when I experienced a lot of
lock-ups with the Eden version of XBMC after I got everything running. I
had some experience with
Mythbox that wasn't particularly positive so I decided to
look for some other type of media server front end. I
could play movies right out of Ubuntu with VLC or Movie Player
and I could also play network music and internet streaming music
as well but I wanted something that integrated the whole thing.
I found it with software called
XBMC. It comes in version for Windows, Linux and Apple
OSX, ATV, ATV2, iOS, Android, and Raspberry Pi. I began
with the current stable release called Eden. I migrated to the
most current release called Frodo (ver. 12) Release Candidate 3.
I'm unsure if it was Eden or something else but when I experienced a lot of
lock-ups with the Eden version of XBMC after I got everything running.
I upgraded to Frodo and have not had a lock-up since. But, I also put fresh
batteries in the Lenovo wireless keyboard. There was no telling how old
the batteries were in that due to the fact it was second hand. So, which
was it? Just one of life's mysteries I guess.
MOVING ON
I decided to try using an old S-Video cable to connect the computer graphics
card to the Panasonic Plasma TV since both the card and the TV have S-Video
connections. The sound output is handled by using a stereo mini-phone plug
to RCA L/R channel conversion cable. I had a couple of these laying
around.
Success - kind of. While I got a picture on the Plasma,
the resolution was limited to 800 X 600 and was very dark. The TV was over
scanning as well and I was missing part of the Ubuntu desktop. The sound
was fine.
I spent some time online trying to figure out the best course of action to get a
better quality video signal and hopefully a 1080p signal from the computer to
the Panasonic Plasma TV. I now had a digital output DVI out on the ATI
card but no DVI in on the monitor. I also have several sets of component video
connections on the flat screen. And, I have 2 HDMI inputs.
After reading many different articles offering all kinds of different approaches
I ended up buying a high speed DVI to HDMI conversion cable. I think I paid
about $8 for it.
After connecting it I was pleasantly surprised to get a full 1080p screen
filling picture. Ubuntu automatically found the Panasonic TV and it's default
resolution! But, there was still one small problem. Over scan. I had no panel and
barely any Unity taskbar showing. I was able to fix that by getting into the
menu setup for the particular HDMI input I was using and select picture size 2.
I have no idea what that did, perhaps it shut off the over scan but the
resolution is now absolutely perfect.
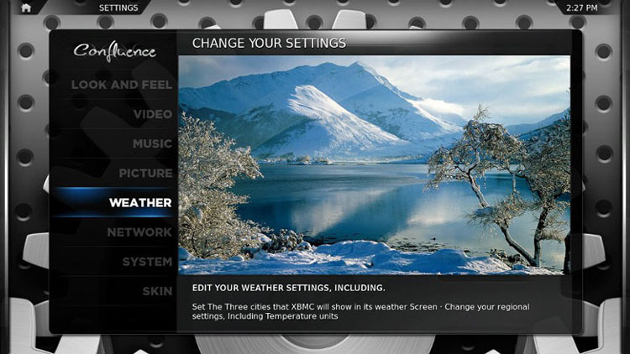
I loaded Samba, connected to my server and all is well. For about $40!
Below is a screenshot of a setup screen and another of the main screen. The skin is called Confluence.
By the way, there is a XBMC users forum.
Here's the link.
|
| |
 |
|
Set up Screen |
|
|
 |
| Main Menu |
| |
|
|
|